Spiced Shortbread Biscuits

Sorry for the lack of posts lately. In the run up to Thanksgiving, I became very ill resulting in a bad sinus infection causing me to come to a grinding halt. I’m usually doing so many things at once, so it was annoying to have to just stop and do nothing in order to get better. So with just days until Christmas, I thought I should at least post a few recipes as my energy levels are slowly on the rise. Cue a super easy cookie recipe with only a few ingredients but lots of spice. Here is what you’ll need:

  • 1 1/2 cups all purpose flour
  • 1/2 cup packed brown sugar
  • 1 teaspoon cinnamon
  • 1/2 teaspoon all spice
  • 1/2 teaspoon ground ginger
  • 1/4 teaspoon salt
  • 1 teaspoon vanilla
  • 3/4 cup butter, softened

First, measure out the flour, sugar, and spices into a bowl and combine well. You should already be able to smell the warming spices coming together.

Next, cube the softened butter and work it into the dough with the vanilla.

You can use a mixer, or just use your hand (like me!). However you do it, you will have a soft, smooth dough eventually.

Once the dough has come together, form it into a cylinder shape, that resembles, um, a wooden log, ha, ha. Place in the fridge for at least 30 minutes to chill, then using a sharp knife, cut off circular shapes and place on a lined tray.

Bake in an oven heated to 350 F / 180 C and bake for 15 – 17 minutes, depending on how crunchy you like your biscuits.

And there you have it, Spiced Shortbread Biscuits! These were super easy to make, and they really don’t require an array of ingredients.  So if you’re looking for something simple to make for your workplace, for Santa on Christmas Eve, or for yourself, give these a try! Thanks for reading and Happy Eating!

Pumpkin Spice Balls

We are well into October, but here in Bristol, we are being spoiled by beautiful weather this weekend. Walking around was so perfect and it certainly doesn’t feel like winter will be here soon. Taking advantage of the nice weather, I went to Zero Green in Bedminster, one of Bristol’s many plastic free shops. You bring your own containers, weigh, fill, then weigh again. The oats, chia seeds, pumpkin seeds, date/raisins, and pulp are from this shop. They also feature almond, cashew, and oat mylk in glass bottles from a lovely company called O!Mylk. They often leave leftover nut pulp for customers to take for free! So I took about a cups worth and decided to make these Pumpkin Spice Balls. Here is what you’ll need:

  • 1 cup almond pulp (or desiccated almonds if you don’t have pulp)
  • 1/4 cup porridge oats
  • 1/4 cup raisins and/or chopped dates
  • 1 tablespoon chia seeds
  • 2 teaspoons pumpkin spice
  • 1 tablespoon honey
  • 1 tablespoon peanut butter (or nut butter of your choice)
  • 5-6 tablespoons puréed pumpkin
  • Pumpkin seeds to coat

Place the pulp, oats, dates & raisins, chia seeds, and pumpkin spice in a bowl. The pulp is moist, so I found it best to mix together with a fork, working all the ingredients together as much as possible.

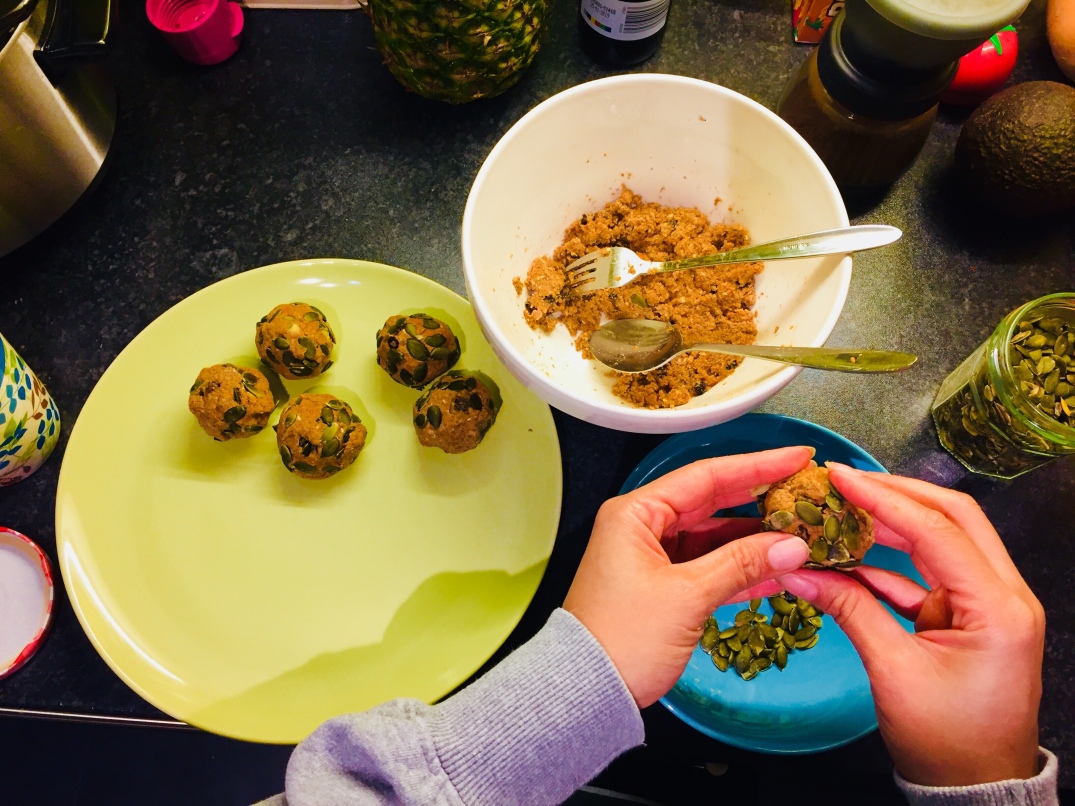
Once mixed, it should look a bit crumbly, as seen above.

Next, add the honey, nut butter, and pumpkin. Really stir it through so that all dry ingredients are well incorporated. If the mixture is too dry and not holding, you can add a bit more pumpkin. If it’s turned out too wet, just sprinkle on a bit more oats.

After rolling into a ball, I squished pumpkin seeds onto the outside. You really have to press them in as they don’t stick easily. Alternatively, you can drizzle the balls in chocolate or icing, then put the seeds on.

And there you have it, Pumpkin Spice Balls! They were super easy to make and would be a fun activity for little ones. There are also a lot of ways to adapt this recipe to your liking. You can always use maple syrup or golden syrup instead of honey. And if you like them sweeter, add more honey and slightly less pumpkin to bind. I think toasted pecans or chocolate chips would work really well in these treats. However you make them, this is a great way to create a healthy snack without producing much waste.

Enjoy the sunshine while it lasts! Thanks for reading and Happy Eating!

Pumpkin Spice Scones

Happy October! Now it’s time for all things pumpkin, which really is one of my favourite things to eat. I’ve also noticed a lot more businesses are offering pumpkin spice flavored treats, which I plan on reviewing at a later date. Anyhow, on to these delicious scones. Here is what you’ll need:

  • 2 cups flour
  • 1 teaspoon baking powder
  • 1/2 teaspoon cinnamon
  • 1/2 teaspoon salt
  • 2 teaspoons pumpkin pie spice
  • 1/4 cup sugar
  • 1/4 cup brown sugar
  • 1 teaspoon chia seeds
  • 1 cup puréed pumpkin
  • 1 tablespoon almond milk
  • 1 teaspoon vanilla
  • Pumpkin seeds to top scones

First, combine all the dry ingredients. Mix very well, making sure you break up any brown sugar lumps.

Next, add the pumpkin, milk, and vanilla. Mix very well until the wet ingredients are fully incorporated, creating a sticky dough.

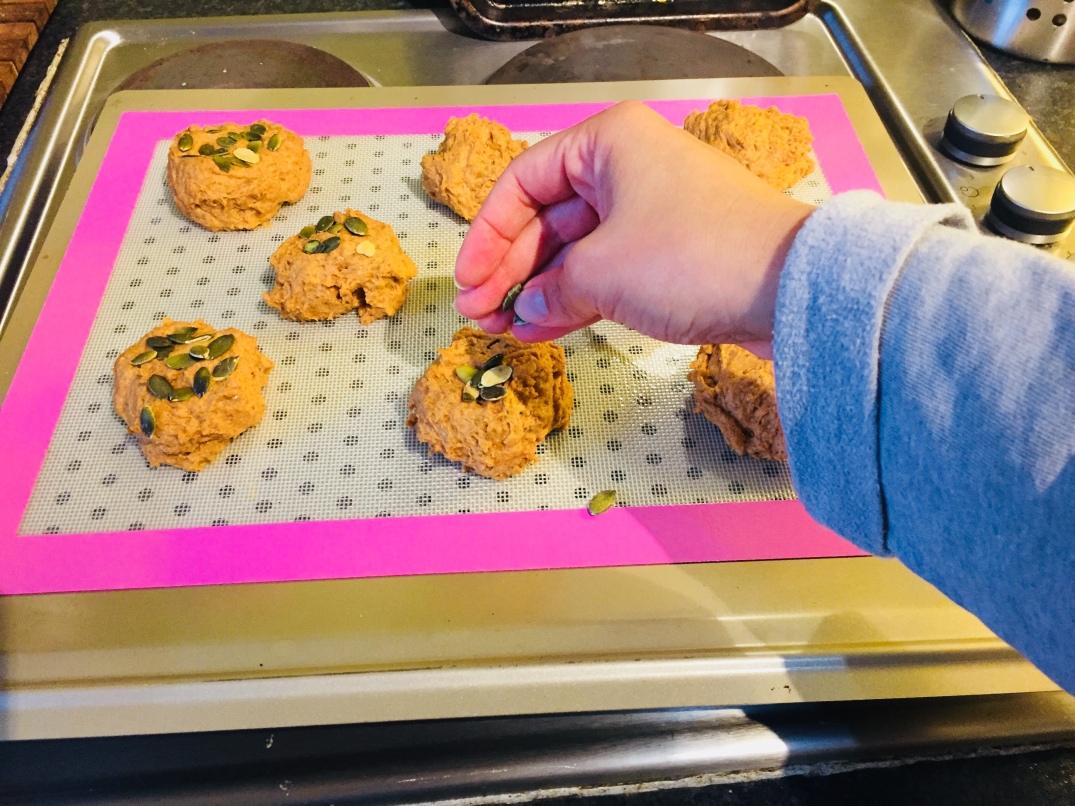
Place 8 even portions of the dough on your baking sheet. Top with pumpkin seeds. Since my seeds are raw, I like putting them on top so they end up with a nice, toasted flavor. Also, if any one likes my baking mat, I got it for £5 at Sainsbury’s.

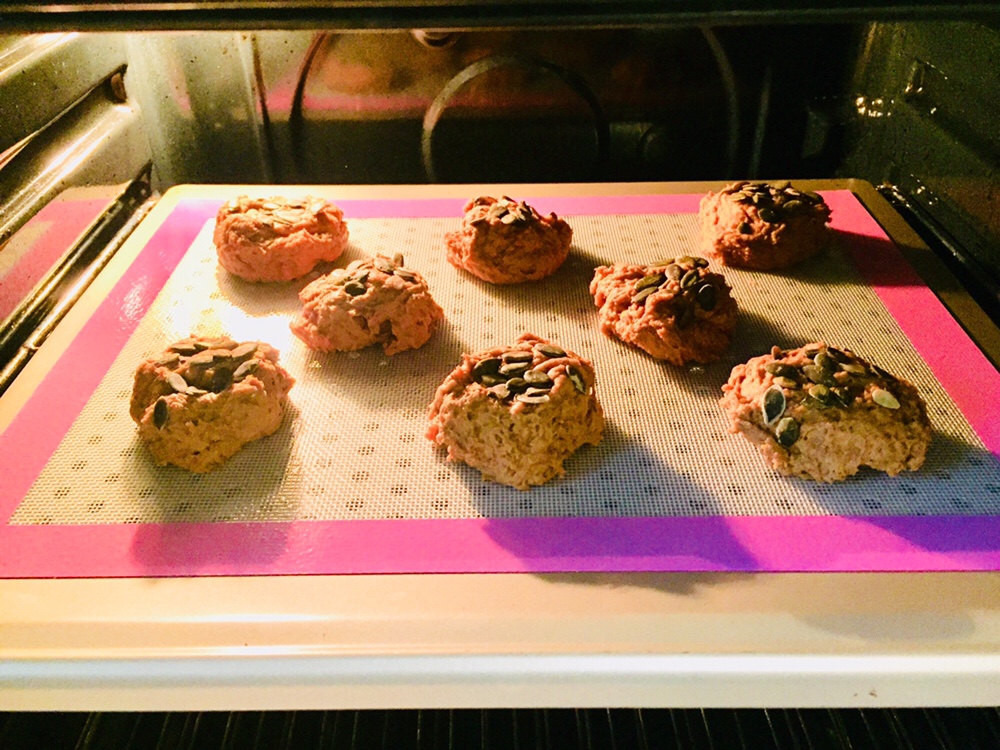
Place into the oven at 350 F / 180 C for 15 minutes. Once done, take out the oven and let cool completely.

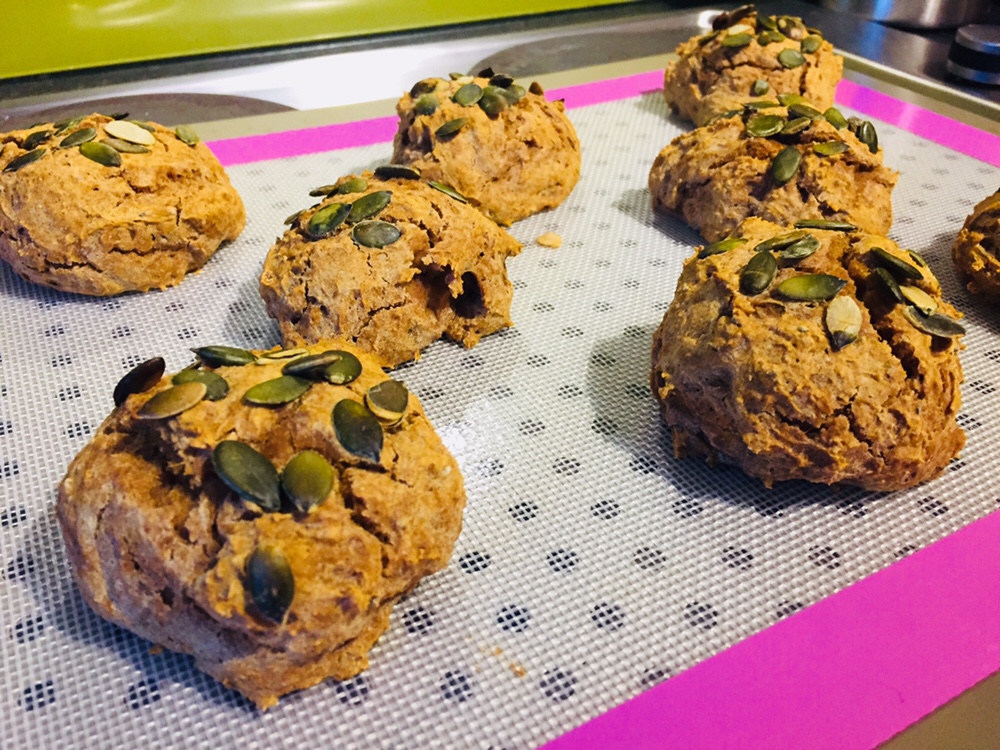
And there you have it, Pumpkin Scones that are vegan, egg free, dairy free, and delicious!

Even without butter, these are soft, chewy, and bursting with pumpkin spice flavor. They are easy to make as you just put all the ingredients into a bowl, mix it up, and bake. No fuss! And if you’re wondering where to find canned pumpkin, Sainsbury’s tends to have them in the American (junk) food aisle. Thanks for reading and Happy Eating!

Easy Blackberry Jam

The weather is starting to turn, but we’re still having lots of sunny afternoons with cool breezes. And, there are still blackberries to be harvested. So, I thought I’d make some easy Blackberry jam with my last haul. It makes a small batch, which is approximately one jar. Here is what you’ll need:

  • 2 cups blackberries
  • 1 cup sugar
  • Juice from 1 lemon

After washing your blackberries very well, place in a small sauce pan with the sugar.

Next, grab a masher and spend several minutes smashing the heck out of those berries. You really want to get the juice flowing so that the berries become a liquid purée like mash up.

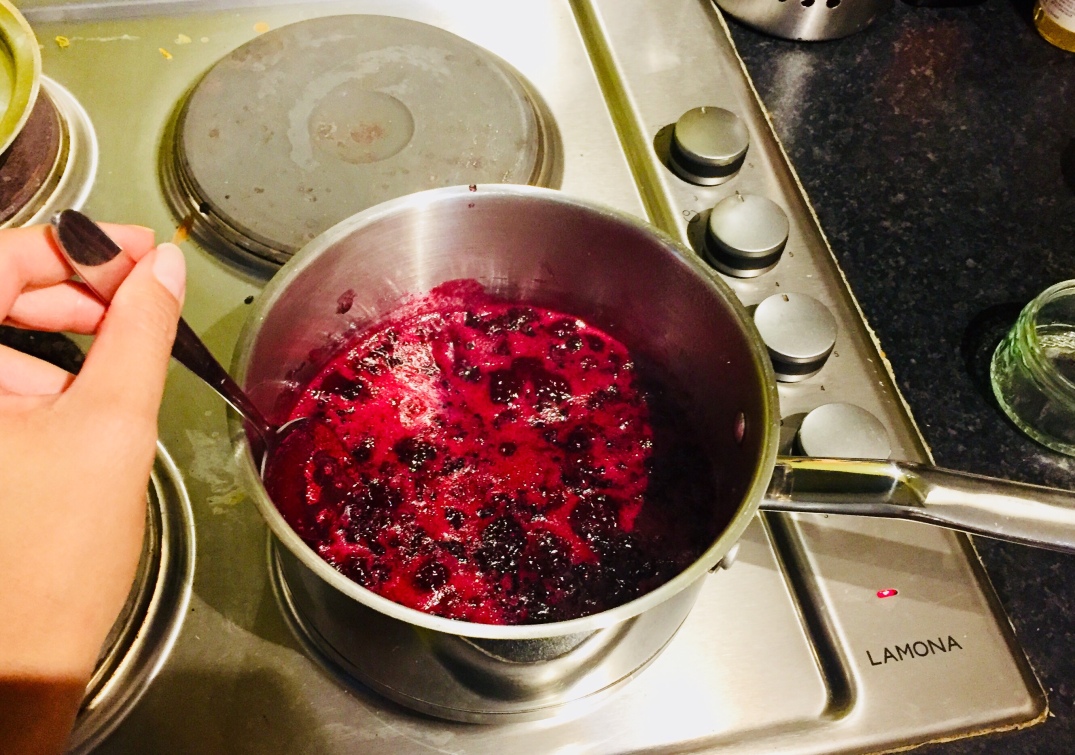
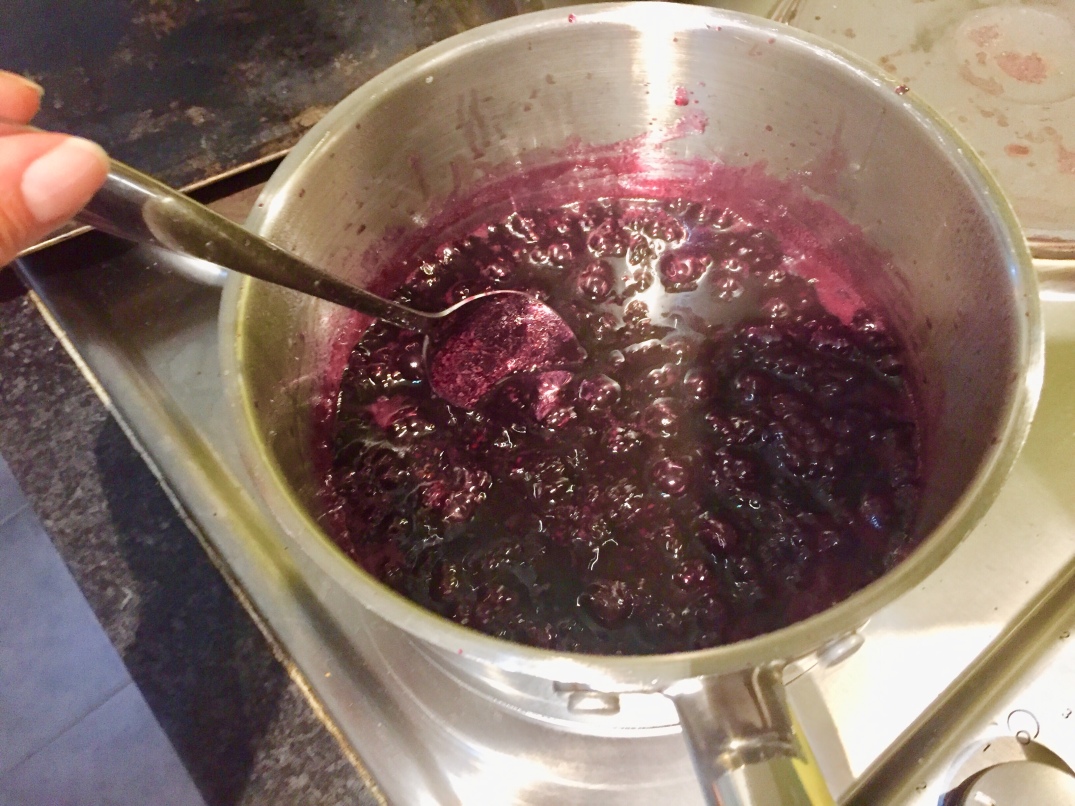
There will still be bits of berry, but as you can see above, it should have lots of juice. Place on the stove and set on high. I used mark 5.

Bring the berry mash to a boil, stirring it the entire time. By constantly stirring, you’ll ensure it does not burn. Once it boils for about 5 minutes, put on medium low and simmer until it thickens. You’ll know it’s ready when it coats the spoon.

Juice the lemon, and stir in the liquid while the berry mixture is still hot.

Make sure your jar is already prepared. It needs to be thoroughly cleaned and boiled to sterilise. While the liquid is still hot, spoon jam into the jar. It will firm up as it cools.

And there you have it, one batch of Easy Blackberry Jam! This is the perfect way to preserve the last of the summer fruit to enjoy into the cold winter months. Stir it in porridge, put it in yogurt, or enjoy on some toast! However you slice it, this jam is just too easy to pass up. Give it a try before the berries disappear. Thanks for reading and Happy Eating!

Wild Fruit Crumble

This cooler weather has been so nice and comfortable. It’s the perfect temperature for running and cycling, and for foraging wild fruit on the way.

I loaded up on these berries and apples during a bike ride, and the most obvious thing to make was a warm and filling crumble. Here is what you’ll need:

  • 2 cups blackberries
  • 3 small apples
  • 1 tablespoon sugar
  • 1 tablespoon flour
  • 1/2 cup porridge oats
  • 1 teaspoon cinnamon
  • 1/4 cup sliced almonds
  • 1/4 cup raisins or sultanas
  • 1/3 cup almond milk

First wash the fruit very well, then peel and chop the apples into chunks. Put all the fruit into your baking dish.

Pour the sugar and flour over the fruit, and mix it around trying to coat the chunks as much as possible.

Next you will prepare the topping, which is essentially a bowl of porridge. Put the oats, cinnamon, almonds, raisins, and almond milk together. Let it sit for about 5 minutes so the oats absorb as much of the liquid as possible.

Spread the topping over the fruit. Make sure it’s as even as possible.

Place in the oven at 180 C / 350 F for 35 – 40 minutes, depending on your oven. It’s done when the fruit is soft and the topping is golden brown.

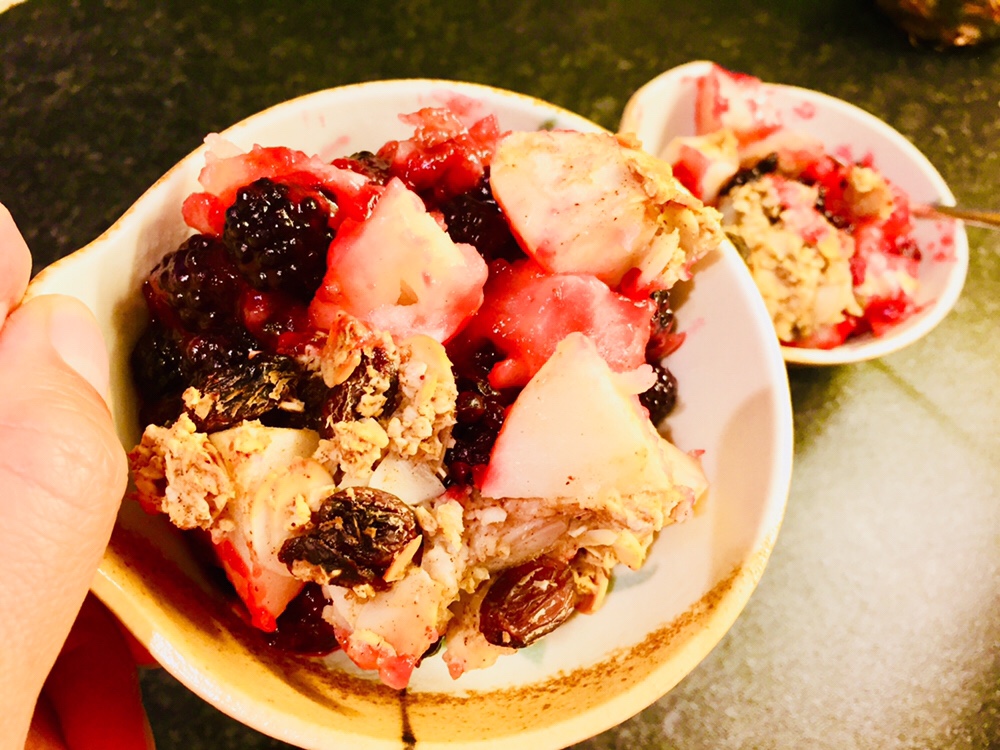
And there, you have it, Wild Fruit Crumble! You can pretty much use any fruit you want. Damson, blueberries, and red plums work well too! And the topping is on the healthy side compared to traditional crumble which often has a lot of butter and sugar. As I’m training for the Bristol Half Marathon, this is definitely a dessert I can get behind! And you can even have it for breakfast! It is part of your five a day and a lovely way to fuel your morning workout. Give this recipe a try and you can start by picking some wild fruit. Thanks for reading and Happy Eating!

Coconut Banana Cookies

Hello Bristol! Anyone else loving these cooler temperatures? I get the feeling that autumn is upon us and that means I can finally fire up the oven! So, as I’m training for the Bristol Half Marathon, I wanted to make these cookies which are great snacks packed with energy. Here is what you’ll need:

  • 2 ripe bananas
  • 1 tablespoon vanilla
  • 1 1/2 cups finely grated coconut
  • 1/4 cup nuts or seeds (I used pumpkin)
  • 1/4 raisins (or chocolate chips)

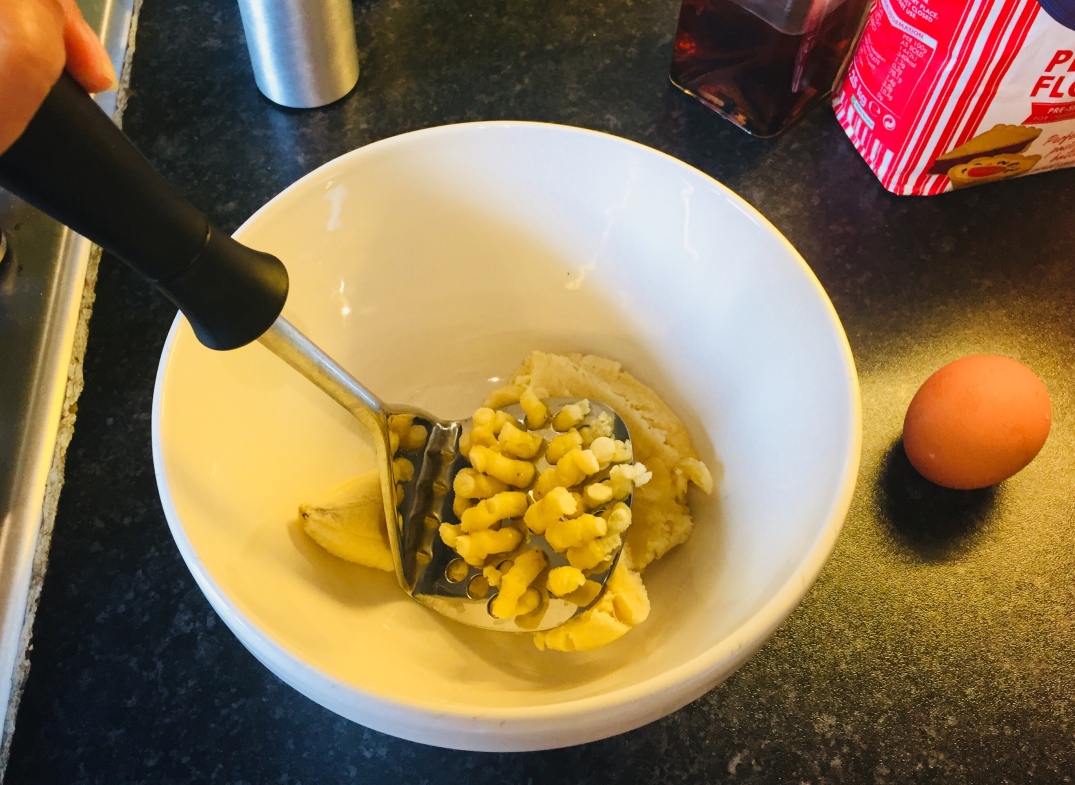
First, mash your bananas very well. The riper they are, the sweeter they’ll be, and the easier they will mash up.

At this point, add some vanilla, stirring it in thoroughly.

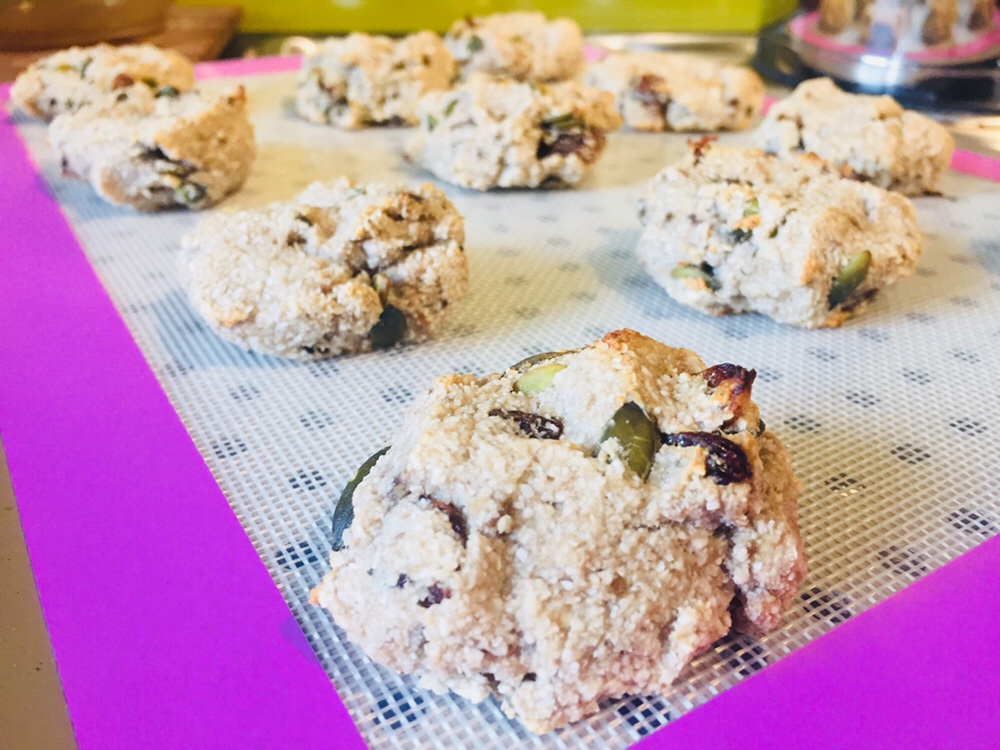
Next, add the coconut, pumpkin seeds, and raisins. I will add that although the pink bag of coconut says flour, it’s more like finely shredded coconut. I do have actual coconut flour which is much finer. I suppose you can use that as well, and if so, let me know how it turns out.

Spoon out the mixture onto a cookie sheet, flattening them a bit. Place them in an oven heated to 350 F / 180 C for 15 minutes. If you want a bit more browning on top, add another 3-5 minutes to that.

And there you have it, Coconut Banana Cookies! These were super easy to make, and start to finish, took just over 30 minutes or so. You can also customize these as you like once you have the banana, coconut, and vanilla base. I think chocolate chips and walnuts would be great together, as well as dates and almonds. However you bake them, this recipe is hard to mess up. Give these a try this weekend as the cooler weather rolls in. Thanks for reading and Happy Eating!
Banana Blondies

What a beautiful Saturday morning we had with perfect conditions for the Balloon Fiesta! Unfortunately that was the last glimpse of summer, which pretty much ended around 10 am. But to be honest, the rain and lower temperatures are very welcomed. It also means that it is now comfortable to heat up my oven! And since the heat has been causing my bananas to ripen very fast, it only makes sense to make up some Banana Blondies. Here is what you’ll need:

  • 1 ripe banana
  • 2/3 cup light brown sugar
  • 1 teaspoon vanilla
  • 1/4 teaspoon salt
  • 1 beaten egg
  • 1 cup flour
  • 1/2 cup melted butter
  • What I like the most about this recipe, is that you can make it using one bowl. And in that bowl, the first thing you’ll do is mash up the banana.
  • Next, add the brown sugar, salt, and vanilla. Combine very well.
  • Next add the egg and beat as much as possible. Ideally, you should beat the egg in a separate bowl. However, I didn’t feel like washing more than I have to, so I stuck to the one bowl baking ideology on this one.
  • Next, mix in the flour.
  • Last, melt the butter and slowly add it in to the batter.
  • As soon as you can, pour it into a square pan. Mine isn’t square, but it’s all I had, so use your imagination.
  • Heat your oven to 180 C / 350 F and bake for ~25 minutes.
  • And there you have it! Banana Blondies!
  • If you’ve got ripe bananas that need to be consumed, forget about banana bread and try these treats. They were soft, had a slight caramel flavour, and melted in my mouth. My only suggestion is that they weren’t very thick, so I’d probably double up the recipe next time. You can also use coconut oil instead of butter to make these dairy free if you’d like. I truly hope you get the chance to make a batch of these as the weather cools a bit. Remember your umbrella this week, thanks for reading, and Happy Eating!
  • Mango Chia Icebox Cake

    Ok guys, it’s still hot up in here! I haven’t baked anything proper in ages because the mugginess is just ugh! So, in honor of Bristol’s Harbour Fest, I decided to make this icebox cake since summer is truly upon us. Back in the states, icebox cakes are popular because they’re easy and perfect to bring to BBQ’s when have a consistent summer year after year. In England, it’s more like a trifle but in a rectangular dish. Here’s what you’ll need:

    • 1 large, ripe mango
    • 1/2 cup chia seeds
    • 2 cups almond milk
    • 1 tablespoon vanilla
    • Lots of coconut biscuits
    • Shredded coconut to top
  • First, you’ll want to prepare the mango chia pudding. Cut up a sweet, ripe mango and combine in a blender with the almond milk and vanilla. You can use any milk, but I prefer almond.
  • Pour the mango mixture into the chia seeds in a medium sized bowl.
  • Mix it up really well. Scrape down any seeds that may be stuck on the sides. Put the mango chia pudding in the fridge for at least 3 hours. You will notice the chia seeds will get sticky as soon as they come into contact with moisture. You may need to give it a stir after an hour, and you’ll know it’s ready when it has a custard like consistency.
  • Now it’s time to prepare the dessert. Start with an even layer of biscuits, as seen above. Then spread on a layer of chia pudding, followed by another layer of biscuits. Then chia pudding, then a final biscuit layer. You can add as many layers as you like, but this amount of chia pudding makes two layers in the dish as seen above.
  • When the layers are complete, top it off with several chunks of fresh mango.
  • Place the dessert in the fridge for at least 3-4 hours. As it sits in the cold, the biscuits will absorb the moisture, becoming soft and cake like.
  • Once it’s set, add lots of shredded coconut on top. Now it’s ready!
  • And there you have it, Mango Chia Icebox Cake! What a delicious summer treat to make without heating up your oven.
  • I love making this dessert because it’s sweet, creamy, and tastes far more decadent than it is. You get some fruit and fibre without the dairy (although you can use milk if you’d like). And, you can easily make it vegan or gluten free as long as you use the appropriate biscuits. This recipe works with other fruits as well, so mix it up and add your own twist to it.
  • I hope you enjoy making this recipe as much as I’ve enjoyed eating it! And enjoy yourself at the Harbour Fest if you’re out Bristol way. Thanks for reading and Happy Eating!
  • No Bake Cookies

    Anyone else hot up in here? Ok, ok, so I know that the weather we’ve been experiencing is called summer – I did grow up in California after all! But after living in Bristol, this sudden heat is all so sudden! I’ve not really baked anything lately because I don’t want to heat up my home any more than I need to. Most homes here don’t have that precious central air conditioning, so we kinda have to rely on harbour side breezes. However, I wanted something sweet to enjoy while watching football and I have to clear out my cupboards. Hence, no bake cookies… aka I’ve got coconut flour and golden syrup that needs to be used up. Here is what you’ll need:

    • 2 1/4 cups coarse coconut flour
    • 3/4 cup almond flour
    • 1/2 cup cranberries
    • 2/3 cup golden syrup
    • 1/4 cup almond milk
    • 1 teaspoon almond extract

    Step one, pour all ingredients into a bowl! Great recipe right? I did make my own almond flour with raw almonds I got from the Zero Green shop in Bristol, and added some organic cranberries I got there as well. And if you’re looking for a coarse coconut flour, I got this one at Southville Deli ages ago, but I’ve also seen the same brand at Sainsbury’s.

    Next, mix it up! If you find the dough is still a bit dry, you can add a bit more syrup or almond milk to bind it together.

    Once the dough is a bit sticky, roll into cookie like shapes and place on a plate.

    Pop into the freezer for about 30-45 minutes to set.

    And there you go, No Bake Cookies, made unique by whatever you’ve got in your kitchen. There are a lot of ways to personalise these as you see fit. You can add nuts and/or chocolate chips. And you can substitute honey or maple syrup for the golden syrup. Or drizzle caramel or chocolate on top. Oh go ahead, just dip them in the chocolate! And the best part is that you don’t have to power up the oven! Make these ahead of time for a cool summer treat, or to bring to a World Cup get together. Stay cool Bristol, thanks for reading and Happy Eating!

    Almond Crackers

    Summer is finally here! Although we have the occasional rain shower, the weather has been absolutely lovely. So even though it’s been warm, I decided to power up the oven and make some homemade crackers featuring some almonds and rosemary I got from Zero Green on North Street in Bedminster. Here is what you’ll need:

    • 1 egg
    • 1 cup (105 g) almond flour
    • 3/4 (110 g) cup plain flour
    • 1 tablespoon rosemary
    • 1/2 teaspoon salt
    • 1 1/2 tablespoons olive oil

    First, I made some fresh almond flour. Simply put some almonds into a blender (I have a Ninja) and pulse it up!

    Pulse until it turns into almond flour, as seen above.

    Now for the crackers… you’ll begin by beating the egg really well. This will be one of the main binding ingredients.

    Then add all the other ingredients to the beaten egg. Mix very well. Once it’s nearly combined, use your hands to press it together.

    Once you’ve got the dough together, roll it out to a few millimeters thick. These are hearty crackers, so I find they end up being thicker and denser than your typical boxed cracker.

    Once it’s rolled out, you can cut into squares or use cookie cutters to make them look fancy.

    Place them evenly on a nonstick tray or line with baking paper, and bake for 10 minutes at 350 F / 180 C.

    And there you have it, Almond Flour Crackers! These are flavorful, savory, and the perfect addition to any garden party. They are lovely with dip or cheese, but just as enjoyable on their own. I originally found this recipe on the California Almonds website, which called for all almond flour which is a great gluten free option. However, I found it to be a bit grainy, hence the addition of plain flour. However you decide to make them, give these a try, you won’t be disappointed!